
Are you an Indian fashion, apparel, lifestyle, electronics, home, or quality-product seller who wants to start selling online? Nipher is an Indian B2C multi-seller ecommerce marketplace built for independent sellers, D2C brands, and growing businesses that want better online discovery without depending only on paid ads.
This guide explains the current Nipher seller onboarding flow: what details to keep ready, how GST details are fetched and confirmed, how to complete DigiLocker identity and bank verification, and what happens after you submit your application. You do not upload PAN, Aadhaar, GST, or bank documents during registration.
If you are ready to apply, open Become a Seller on Nipher.
What is Nipher?
Nipher is an online marketplace where Indian shoppers can discover products from multiple sellers and brands. The platform supports fashion shopping as a core category, while also allowing sellers in other quality categories such as footwear, electronics, home essentials, accessories, and lifestyle products.
For sellers, Nipher is designed around brand identity, product discovery, marketplace tools, and organic growth. Instead of treating every product as only a price listing, Nipher gives sellers space to build a recognizable shop/brand presence, list products clearly, manage orders, use search insights, and serve buyers through the seller workspace.
In simple words: Nipher helps sellers bring their products online, manage catalog and orders, receive payouts, and improve visibility across a marketplace built for Indian buyers.
Who can become a seller on Nipher?
Eligible Indian individuals and businesses can apply to sell on Nipher.
You can apply as:
- An individual seller
- A partnership firm
- An LLP
- A private limited company
- A brand owner or business selling its own catalog
- A seller already active on another marketplace
The registration flow collects your account, business, GST, and pickup details. After you submit, you complete identity verification through DigiLocker and verify your payout bank account from the seller workspace. Nipher reviews your application before live selling is enabled.
Details to keep ready before applying
Before opening the seller application, keep these ready:
- Seller/contact name
- Shop or brand name
- Email address
- Indian mobile number for OTP verification
- Website or store link, if available
- Business type and primary selling category
- GSTIN, if registered
- PAN of the authorized person for DigiLocker identity verification
- Pickup location name, phone number, and address
- Bank account holder name, account number, and IFSC code
- Agreement confirmation before submission
You do not need to prepare document files for upload. GST details are fetched from the GSTIN, identity is verified through DigiLocker with your consent, and the bank account is checked directly.
Step-by-step seller registration process on Nipher
The current seller registration form has three steps:
1. Basic info and phone verification 2. Business details and GSTIN verification, or the option shown to continue without GST 3. Pickup location, agreements, and account password
After you submit, the seller workspace guides you through DigiLocker identity verification and bank account verification. Your draft is saved automatically while you fill the form.
Before Step 1: Open Become a Seller and start registration
Go to Become a Seller on Nipher. Start the seller application and sign in or continue with the account option shown on the page.
The seller flow is connected to your Nipher account. Use an email you can access because approval, password setup, and important account messages are sent to that email.
Step 1: Complete Basic info
In the Basic info step, enter:
- Seller name
- Email address
- Shop / brand name
- Website or store link, if available
- Phone number
You must verify your Indian mobile number with OTP. Once verified, the form marks the number as verified.
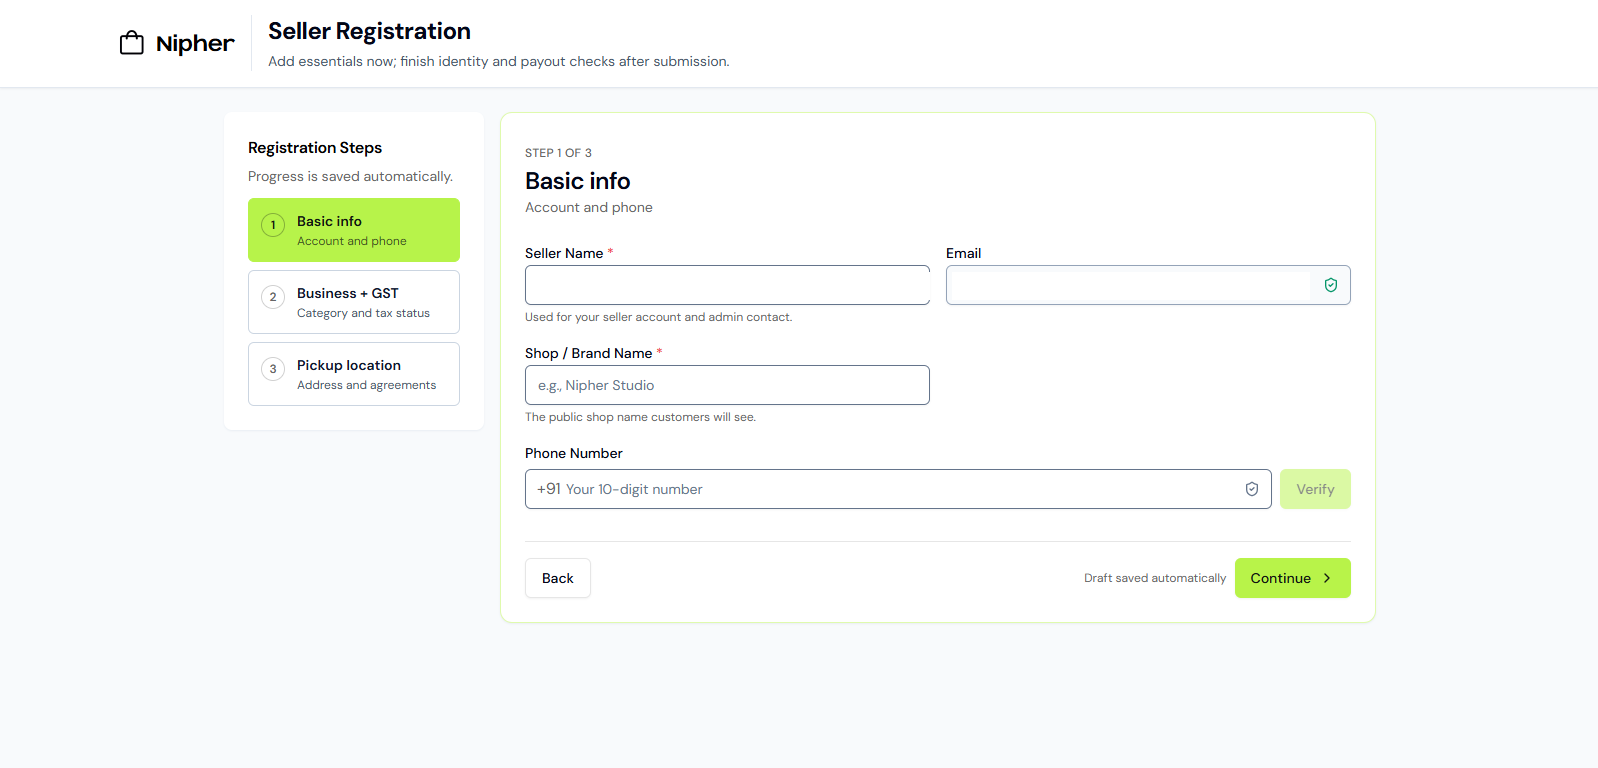
Your shop or brand name is important because it is the public seller identity buyers may see on product pages, profile surfaces, Q&A, and seller-related areas. Use the actual name you want customers to remember.
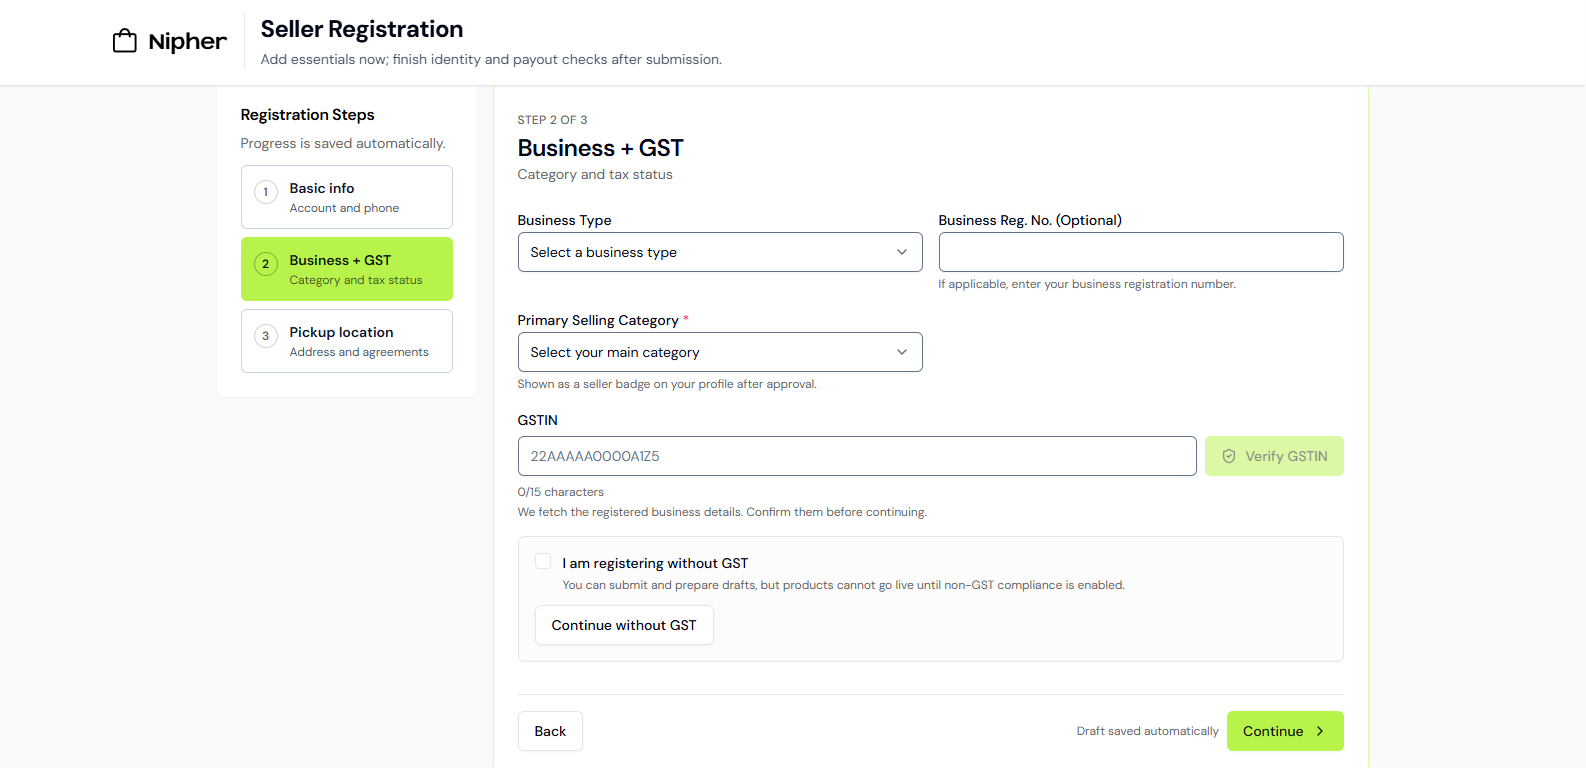
Step 2: Complete Business + GST details
In the Business + GST step, choose your business type and primary selling category.
If you have a GSTIN, enter it and select Verify GSTIN. Nipher fetches the registered business details for you to review and confirm. You do not upload a GST certificate or manually re-enter the fetched legal name and registered address.
If you are applying without GST, use the option shown in the form. The current form says non-GST sellers can prepare drafts, but products cannot go live until the required non-GST compliance is enabled.
This step also includes a “Tell Us More” section about your business and products. Identity verification happens after you submit, through a consented DigiLocker flow. Keep the PAN of the authorized person ready; no PAN card file is requested.
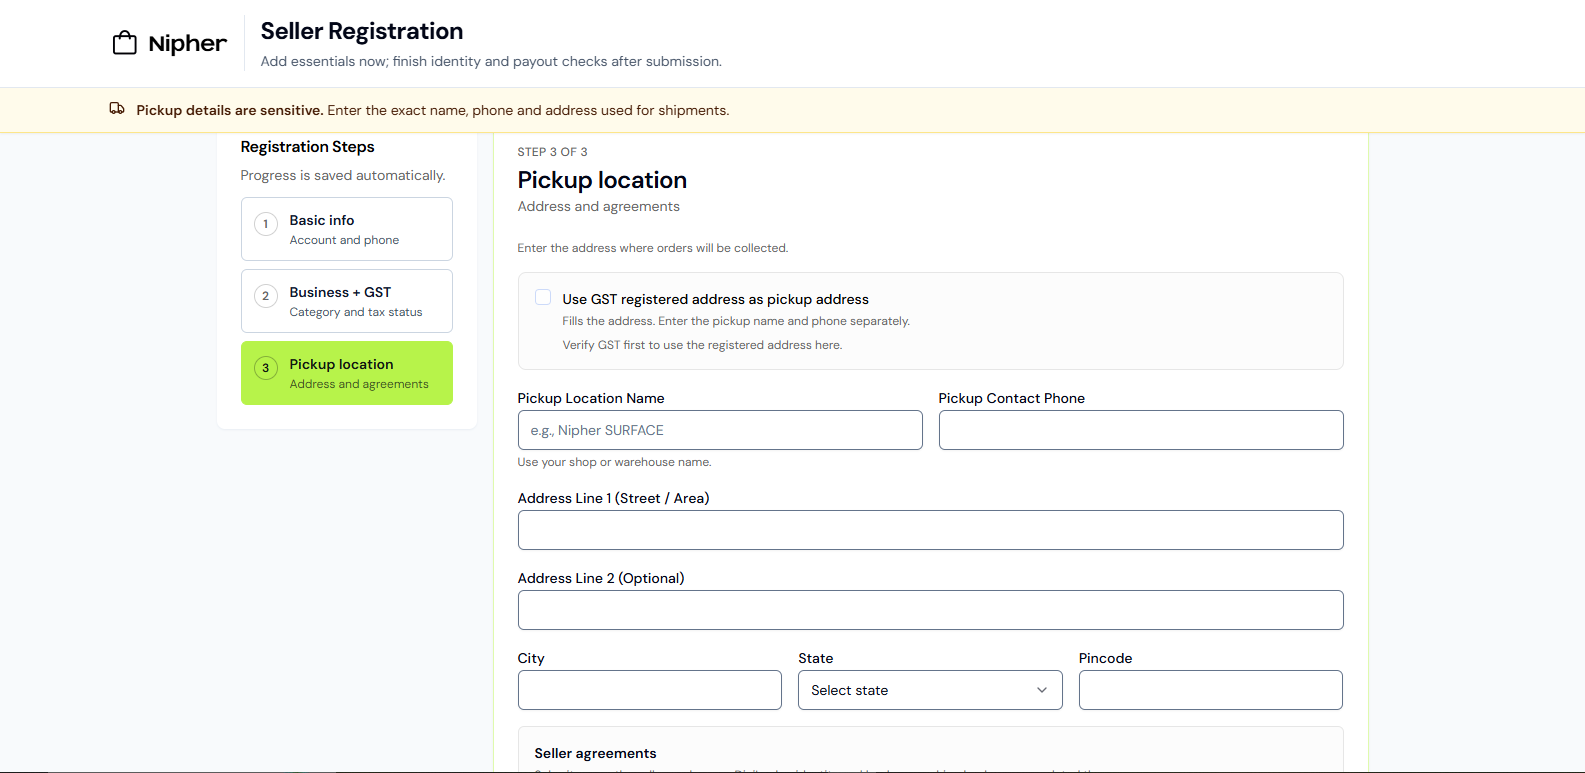
Step 3: Add pickup details and submit
Pickup details are used for shipments, so enter the exact pickup location name, contact phone, and address. You can use your verified GST address to fill the address, or enter a different pickup location; provide the pickup name and phone separately. Accept the seller agreements and create a seller login password if your account does not already use email and password.
Review the information and submit your application. There is no document-upload step in the current registration form. You do not need to upload a PAN card, Aadhaar PDF, GST certificate, cancelled cheque, or passbook.
After submission, the seller workspace opens. Complete the identity and bank checks there before expecting live selling access.
Verify your identity with DigiLocker
From the seller workspace, start identity verification. Enter the PAN for the authorized person and give consent to continue to DigiLocker. Complete verification there, then review and confirm the identity details returned to Nipher. You do not upload PAN or Aadhaar files.
For some GST-registered individual sellers, the PAN may be read from the verified GSTIN. Follow the PAN shown in your seller workspace.
Verify your bank account
Open payout settings in the seller workspace and enter the account holder name, IFSC, bank account number, and the number again to confirm it. Nipher checks the account directly; no deposit, cancelled cheque, or passbook upload is required.
The account holder name must match your verified DigiLocker identity. For a non-individual business, it can match either the verified identity or the registered GST business name. Live selling remains locked until bank verification is complete.
After you submit: account access and approval
The seller workspace opens so you can complete DigiLocker identity and bank verification while Nipher reviews your application. You can prepare draft products, but live selling stays locked until the required checks and approval are complete.
Create your seller password during registration if your account does not already have email-and-password login. After approval, sign in at Nipher Login with your registered seller email and password. If you forget your password, use Forgot Password.
How to list products after approval
After approval, open the seller workspace and go to the Products section.
For each product, prepare:
- Product title
- Product description
- Category and subcategory
- Brand details
- Price and MRP
- Stock quantity
- Product images
- Size or variant details, if applicable
- Material, color, care, warranty, or other buyer-useful details
For fashion products, include clear sizing, fit, fabric, color, care instructions, and multiple product images. Strong product information helps buyers understand the item and helps search systems understand what the product is.
Use clean product titles. A useful title normally includes brand, product type, key attribute, and audience. For example:
Brand Name Men’s Cotton Casual Shirt - Light Blue Floral Print
Avoid keyword stuffing. Make the title readable for shoppers first.
How payouts work on Nipher
Seller payout eligibility depends on delivered/completed orders and return-window rules.
In general:
- Delivered orders become payout eligible after the 7-day return window.
- COD orders are eligible only after cash collection is confirmed.
- Sellers request payouts manually from the seller dashboard.
- Approved manual bank transfers are usually credited to the verified bank account in 2 to 5 working days, excluding bank or public holidays.
- Payouts require correct bank details and seller account verification.
Nipher’s starter commission structure gives eligible sellers their first 20 completed orders at 0% platform commission. After the starter tier, normal platform commission tiers apply according to the active seller agreement and platform fee settings.
For finance and tax compliance, sellers should keep their own records and consult a CA when needed. Nipher provides platform records where available, but sellers remain responsible for their own GST, PAN, invoices, returns, and accounting compliance.
How seller referral codes work
Seller referral is separate from customer refer-and-earn.
After seller approval, a seller can open Seller Referral and get a personal seller referral code and invite link. The invite link uses the `sellerRef` parameter and points to the Become a Seller flow.
Example format:
`https://nipher.in/become-a-seller?sellerRef=YOURCODE`
The invited seller can use the invite link or apply the code later from the seller referral page after seller access is active.
Important referral rules:
- Seller referral is seller-to-seller.
- Self-referral is blocked.
- A seller account can link only one seller referral code.
- Opening a referral link or using Google sign-up is not enough by itself if the code is not linked.
- After seller approval, the invited seller should open Seller Referral and confirm the referral code is linked.
- The invited seller gets the normal first 20 completed orders at 0% platform commission.
- If the seller referral is linked correctly, the invited seller can get up to 5 more eligible orders at 0% platform commission after the first 20 completed orders.
For the full referral explanation, read How Seller Referrals Work on Nipher.
Tips to get discovered after joining Nipher
Nipher is built to support organic product discovery, so your listing quality matters.
To improve visibility:
- Use clear product titles
- Write useful descriptions
- Add product attributes shoppers search for
- Upload clear, high-quality images
- Keep stock updated
- Price products accurately
- Choose the right category
- Add size and variant details
- Dispatch orders on time
- Encourage genuine reviews after delivered orders
- Use seller tools and search insights to understand demand
Do not copy generic marketplace descriptions. A strong listing should explain what the product is, who it is for, what makes it useful, and what the buyer should know before purchase.
Common mistakes to avoid
Avoid these mistakes during seller registration:
- Entering a GSTIN that does not match the business details returned for confirmation
- Skipping DigiLocker consent or leaving identity verification incomplete
- Entering a bank account name that does not match the verified identity or GST business name
- Using a pickup address that is not the real pickup point
- Using underscores in the pickup location name
- Mistyping the bank account number or IFSC code
- Submitting before the phone number is verified
- Forgetting to complete the “Tell Us More” section
- Trying to list live products before verification and approval
- Assuming Google sign-up automatically applies a seller referral code
FAQs
Do I need GST to become a seller on Nipher?
If you have a GSTIN, enter it in the registration form and verify the details fetched for your business. The form also offers a way to continue without GST; non-GST sellers can prepare drafts, but products cannot go live until the required non-GST compliance is enabled. GST obligations depend on your business and applicable rules, so confirm what applies to you.
Do I need to upload PAN, Aadhaar, GST, or bank documents?
No. The current flow fetches GST registration details from the GSTIN, verifies identity through a consented DigiLocker session, and checks bank ownership directly from payout settings. You do not upload a PAN card, Aadhaar PDF, GST certificate, cancelled cheque, or passbook.
What happens after I submit the seller application?
The seller workspace opens. Complete DigiLocker identity and bank verification there while Nipher reviews your application. You can prepare drafts, but live selling stays locked until the required checks and approval are complete. If details do not match, Nipher may ask you to correct them.
How do I log in for the first time after approval?
Use the password you created during registration and sign in with your registered seller email at Nipher Login.
What if I forgot my seller password?
Open Forgot Password, enter the approved seller email, and create a new password from the reset email.
Can I sell in more than one category?
You select a primary selling category during onboarding. After approval, list each product in the most accurate product category so buyers and search systems can understand it correctly.
How does seller referral help?
If a seller referral code is linked correctly, the invited seller gets the normal first 20 completed orders at 0% platform commission, then up to 5 additional eligible orders at 0% platform commission after those first 20 completed orders.
Where do I apply?
Start here: Become a Seller on Nipher.
You can also read the public documentation for seller onboarding, seller referrals, seller guidelines, and the seller agreement.